Home Blog Page 10

Real Estate Photography Tips to Attract More Buyers

0

In today’s digital age, the first impression a potential buyer has of a property is often through photographs. High-quality images can make all the difference between a listing that attracts buyers and one that gets overlooked. Real estate photography is more than just snapping pictures; it’s about capturing the essence and appeal of a property in a way that resonates with buyers. Whether you’re a professional photographer or a real estate agent taking your own photos, these tips will help you create stunning images that attract more buyers.

1. Invest in the Right Equipment

The foundation of great real estate photography starts with the right equipment. A good DSLR camera with a wide-angle lens is essential. Wide-angle lenses capture more of the room, making spaces look larger and more inviting. A tripod is also crucial to ensure stability and prevent blurry images. For added professionalism, consider investing in external lighting and a flash, especially for properties with dim lighting.

2. Understand the Importance of Lighting

Lighting can make or break a real estate photo. Natural light is your best friend, so schedule your photoshoots during the day when the light is bright but soft. Avoid shooting at noon when the light is harsh and creates unwanted shadows. Instead, aim for early morning or late afternoon when the light is warmer and more diffused. If natural light isn’t available, use artificial lighting strategically to brighten up the space without washing out the colors.

3. Stage the Property

Before you start snapping pictures, make sure the property is well-staged. Declutter the space and remove any personal items that might distract potential buyers. A clean, neutral space allows buyers to envision themselves living in the property. Add small touches like fresh flowers, a bowl of fruit, or a cozy throw to make the space feel more inviting.

4. Focus on Composition

Composition is key in real estate photography. The rule of thirds is a helpful guideline: imagine the image is divided into nine equal parts by two equally spaced horizontal and vertical lines. Place the most important elements of the room along these lines or at their intersections. This creates a balanced and visually appealing image. Also, try to shoot from a corner to give a sense of depth and space.

5. Highlight Key Features

Every property has unique features that set it apart from others. Whether it’s a beautiful fireplace, a spacious kitchen, or a stunning view, make sure to highlight these features in your photos. Take close-up shots to capture the details and use wide-angle shots to show how these features fit into the overall space. By focusing on what makes the property special, you’ll attract buyers who are specifically looking for those features.

6. Capture the Exterior

The exterior of the property is just as important as the interior. Start by capturing the front of the house, as this will likely be the first image potential buyers see. Make sure the lawn is well-maintained, the driveway is clear, and any outdoor furniture is arranged neatly. Don’t forget to photograph the backyard, garden, or any outdoor amenities like a pool or patio. Aerial shots taken with a drone can also provide a unique perspective, showcasing the property’s location and surroundings.

7. Use HDR Photography

High Dynamic Range (HDR) photography involves taking multiple exposures of the same scene and blending them together to create a balanced image. This technique is particularly useful in real estate photography, where lighting conditions can vary greatly within a single shot. HDR helps to bring out the details in both the shadows and highlights, resulting in a more realistic and appealing image.

8. Edit Your Photos

Editing is a crucial step in the real estate photography process. Use photo editing software to adjust the brightness, contrast, and saturation of your images. Straighten any crooked lines and remove any unwanted objects or blemishes. However, be careful not to over-edit. The goal is to enhance the natural beauty of the property, not to create an unrealistic portrayal.

9. Show the Flow of the Space

When photographing a property, it’s important to show how the rooms connect to each other. This helps buyers get a sense of the layout and flow of the space. Take photos from doorways or hallways that show how one room leads into another. If possible, include floor plans in your listing to give buyers a clear understanding of the property’s layout.

10. Pay Attention to Angles

The angle at which you shoot can greatly affect how a room appears in photos. Shooting from a low angle can make furniture and objects appear larger, while shooting from a higher angle can make a space look more open. Experiment with different angles to see which ones best capture the room’s dimensions and features. Avoid extreme angles that distort the space or make it look unnatural.

11. Don’t Forget the Details

While wide-angle shots are important for showing the overall space, don’t forget to capture the details. Close-up shots of unique fixtures, finishes, or architectural details can add interest to your listing and help buyers appreciate the quality and craftsmanship of the property. These detail shots can also be used to break up the wide shots in your listing, creating a more engaging visual experience.

12. Capture Seasonal Appeal

If the property has outdoor spaces, consider capturing the seasonal appeal. For example, if the garden is in full bloom during the spring, take photos that showcase the colorful flowers and lush greenery. In the winter, highlight any cozy outdoor features like a fire pit or covered patio. Showing the property’s appeal throughout the seasons can help buyers envision living there year-round.

13. Be Mindful of Reflections

Reflections can be a challenge in real estate photography, especially in rooms with mirrors or glass surfaces. Be mindful of where you position yourself to avoid capturing unwanted reflections in your photos. If necessary, use photo editing software to remove or minimize reflections that distract from the overall image.

14. Capture the Neighborhood

The neighborhood and surroundings can be a major selling point for a property. Take photos of nearby parks, schools, shopping centers, or other amenities that might attract buyers. If the property has a great view, make sure to capture it in your photos. Showing the neighborhood helps buyers understand the lifestyle that comes with the property.

15. Use Virtual Staging

If the property is vacant, virtual staging can be an effective way to show its potential. Virtual staging involves digitally adding furniture and decor to the photos to make the space look lived-in and inviting. This is often more cost-effective than traditional staging and allows for more flexibility in how the space is presented.

16. Include a Variety of Shots

When creating a real estate listing, it’s important to include a variety of shots that show different aspects of the property. Start with a wide shot of each room to give an overview, then follow up with detail shots that highlight key features. Include both interior and exterior photos, and don’t forget to capture any special amenities. A well-rounded set of photos gives buyers a complete picture of the property.

17. Optimize Your Images for the Web

In addition to taking great photos, it’s important to optimize your images for online viewing. Compress your images to reduce file size without sacrificing quality, so they load quickly on the web. Use descriptive file names and alt text that include relevant keywords, such as “modern-kitchen-real-estate-photo.jpg.” This not only helps with search engine optimization (SEO) but also makes your images more accessible to users with visual impairments.

18. Create a Virtual Tour

In today’s real estate market, virtual tours have become increasingly popular. A virtual tour allows buyers to explore the property from the comfort of their own home. There are various tools available that can help you create a 360-degree tour or a video walkthrough. Adding a virtual tour to your listing can increase engagement and attract more serious buyers.

19. Consider the Buyer’s Perspective

When taking photos, always consider the buyer’s perspective. What are the most important features to highlight? What angles and compositions will make the property look most appealing? Put yourself in the buyer’s shoes and think about what they would want to see in the photos. By focusing on the buyer’s needs and preferences, you’ll create images that resonate and encourage them to take the next step.

20. Keep the Photos Updated

If the property has been on the market for a while, it’s important to keep the photos updated. Seasonal changes, renovations, or improvements to the property should be reflected in the listing photos. Updated photos show that the property is well-maintained and can reignite interest from potential buyers who may have seen the listing before.

21. Collaborate with a Professional

If you’re not confident in your photography skills, consider collaborating with a professional real estate photographer. A professional has the expertise and equipment to capture the property in the best light, ensuring that your listing stands out. While it may be an additional investment, the potential return in terms of buyer interest and faster sales can be well worth it.

22. Prepare for the Shoot

Preparation is key to a successful real estate photoshoot. Make sure the property is clean, staged, and ready to be photographed before you start. Walk through the property and make a list of the shots you want to capture. Consider the time of day and lighting conditions to ensure the best results. By preparing in advance, you’ll be able to capture the property in its best light.

23. Analyze and Learn from Feedback

After your listing goes live, pay attention to the feedback you receive from potential buyers and real estate agents. Analyze which photos are getting the most attention and which ones might be overlooked. Use this feedback to refine your photography skills and improve future listings.

Conclusion

Real estate photography is a powerful tool in attracting buyers and selling properties quickly. By investing in the right equipment, understanding the importance of lighting and composition.

How to Choose the Right Water Heater for Your Home

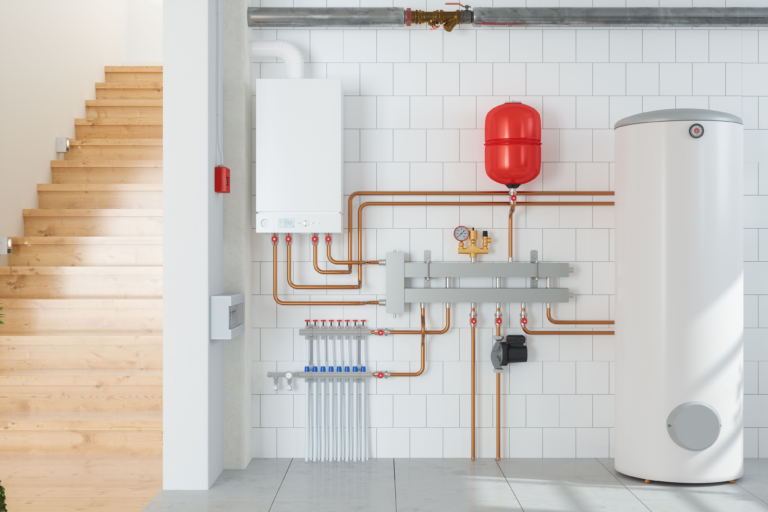
Choosing the right water heater for your home is an important decision that impacts your comfort, energy bills, and the environment. With a variety of options available, making the right choice can feel overwhelming. This comprehensive guide will walk you through the key factors to consider, helping you make an informed decision.

1. Understand Your Hot Water Needs

Before diving into the different types of water heaters, it’s essential to assess your household’s hot water needs. Consider the number of people in your household, the frequency of hot water usage, and the peak times when hot water is in demand. A family of four will have different needs than a single person living alone.

2. Types of Water Heaters

Water heaters come in several types, each with its own set of advantages and disadvantages. Understanding the differences will help you narrow down your options.

  • Storage Tank Water Heaters: These are the most common type. They consist of an insulated tank where water is heated and stored until needed. While they are reliable, they can be less energy-efficient since they continually heat water even when not in use.
  • Tankless Water Heaters: Also known as on-demand water heaters, these units heat water only when you need it. They are more energy-efficient but can be more expensive upfront.
  • Heat Pump Water Heaters: These units use electricity to move heat from the air or ground to heat water. They are highly efficient but require more space and a higher initial investment.
  • Solar Water Heaters: Powered by solar energy, these systems are environmentally friendly and can save you money on energy bills. However, they depend on the climate and can have higher upfront costs.
  • Condensing Water Heaters: These units are ideal for homes that use natural gas. They capture and reuse exhaust gases to heat water, making them more energy-efficient.

3. Energy Efficiency

Energy efficiency is a critical factor when choosing a water heater. An energy-efficient unit will save you money on utility bills and reduce your environmental footprint. Look for the Energy Factor (EF) rating, which indicates the efficiency of the heater. The higher the EF, the more efficient the water heater.

4. Fuel Type

The type of fuel your water heater uses will significantly impact its efficiency and operating costs. Common fuel types include:

  • Electricity: Widely available and easy to install, but typically more expensive to operate.
  • Natural Gas: More cost-effective than electricity, but requires a gas line and proper ventilation.
  • Propane: Similar to natural gas but often used in areas without natural gas availability.
  • Solar Energy: Free and renewable, but dependent on sunlight availability.
  • Geothermal Energy: Used in heat pump water heaters, this is highly efficient but requires specific conditions and equipment.

5. Size and Capacity

Choosing the right size water heater is crucial to ensure it meets your household’s needs without wasting energy. For storage tank water heaters, consider the tank’s capacity, typically measured in gallons. For tankless water heaters, look at the flow rate, measured in gallons per minute (GPM). A unit too small will run out of hot water quickly, while an oversized unit will lead to unnecessary energy consumption.

6. Installation and Maintenance Costs

The initial cost of a water heater is just one part of the equation. You should also consider installation costs, which can vary depending on the type of water heater and the complexity of the installation. Additionally, factor in the ongoing maintenance costs, such as periodic inspections, part replacements, and potential repairs.

7. Lifespan and Warranty

Water heaters have varying lifespans, typically ranging from 10 to 20 years, depending on the type and model. Consider the longevity of the unit and the warranty offered by the manufacturer. A longer warranty often indicates a more durable product and provides peace of mind in case of issues.

8. Environmental Impact

If you’re environmentally conscious, you’ll want to choose a water heater that minimizes your carbon footprint. Solar, heat pump, and high-efficiency gas water heaters are excellent options. Additionally, consider units with smart technology that allows you to monitor and adjust energy usage.

9. Space Requirements

Different water heaters require different amounts of space. Storage tank heaters need room for the tank, while tankless models are more compact and can be mounted on walls. Heat pump and solar water heaters may require even more space, including room for additional components like solar panels or a heat pump.

10. Smart Technology

Modern water heaters often come with smart features that allow you to control and monitor them via your smartphone or home automation system. These features can enhance convenience and efficiency, providing insights into your water usage and allowing you to adjust settings remotely.

11. Safety Features

Safety should always be a priority when choosing a water heater. Look for models with built-in safety features such as:

  • Automatic Shut-Off: Prevents the water heater from overheating.
  • Pressure Relief Valves: Releases excess pressure to prevent tank explosions.
  • Temperature Control: Allows you to set a safe water temperature to avoid scalding.

12. Budget Considerations

Your budget will play a significant role in determining which water heater is right for you. While energy-efficient and smart models may have higher upfront costs, they can save you money in the long run through lower energy bills and reduced maintenance. Decide on a budget and consider both short-term and long-term costs.

13. Local Climate

Your local climate can impact the efficiency and effectiveness of certain water heaters. For example, solar water heaters are ideal for sunny climates but may not be as effective in areas with limited sunlight. Similarly, heat pump water heaters work best in warmer climates where they can draw heat from the air.

14. Consulting a Professional

Choosing the right water heater can be complex, especially with so many factors to consider. Consulting with a professional plumber or HVAC technician can provide valuable insights. They can assess your home’s specific needs, recommend the best options, and ensure proper installation.

15. Evaluating Long-Term Savings

While the initial cost of a water heater is important, consider the long-term savings as well. An energy-efficient model may cost more upfront but can significantly reduce your utility bills over time. Calculate the total cost of ownership, including purchase price, installation, maintenance, and energy costs, to determine the most cost-effective option.

16. Rebates and Incentives

Many governments and utility companies offer rebates and incentives for purchasing energy-efficient water heaters. These incentives can reduce the overall cost of the unit and make upgrading to a more efficient model more affordable. Check with your local energy provider or government agencies to see if you qualify for any programs.

17. Comparing Brands and Models

Not all water heaters are created equal. Some brands are known for their durability, efficiency, and customer service. Take the time to compare different brands and models, read reviews, and check for any awards or certifications that indicate quality and reliability.

18. Noise Levels

Some water heaters, particularly heat pump and tankless models, can be noisy. If the unit will be installed near living spaces, consider a model known for quiet operation. Noise levels are often overlooked but can impact your comfort if the unit is located in or near a bedroom or living area.

19. Resale Value

While you may not be thinking about selling your home, choosing a high-quality water heater can add value to your property. Potential buyers may appreciate an energy-efficient model, and having a new or recently upgraded water heater can be a selling point.

20. Environmental Certifications

Look for water heaters with environmental certifications such as ENERGY STAR. These certifications indicate that the unit meets strict energy efficiency guidelines and is better for the environment. They also provide assurance that the product has been independently tested and verified.

21. Ease of Use

Consider how easy the water heater is to use and maintain. Features like intuitive controls, easy access for maintenance, and clear instructions can make a big difference in your day-to-day experience. A user-friendly design ensures that you can quickly adjust settings and troubleshoot issues without needing professional help.

22. Upgrading vs. Replacing

If you’re replacing an existing water heater, consider whether upgrading to a different type might be beneficial. For example, switching from a traditional storage tank heater to a tankless model could save space and energy. However, be mindful of the installation requirements, as some upgrades may require additional modifications to your home’s plumbing or electrical systems.

23. Impact on Water Quality

Some water heaters, particularly those with tanks, can affect the quality of your hot water. Over time, sediment can build up in the tank, leading to discolored water or strange odors. Regular maintenance can mitigate this, but it’s worth considering a model with features that reduce sediment buildup or improve water quality.

24. Considering Future Needs

Think about your future needs when choosing a water heater. If you plan to expand your family or add more bathrooms, you may need a unit with a higher capacity. Conversely, if your household size is likely to decrease, you might opt for a smaller, more energy-efficient model.

25. Consulting Online Resources

Take advantage of online resources to research water heaters. Many websites offer detailed comparisons, user reviews, and expert advice. These resources can help you make a more informed decision by providing real-world insights into the performance and reliability of different models.

Conclusion

Choosing the right water heater for your home involves balancing your needs, budget, and environmental considerations. By understanding the different types of water heaters, their energy efficiency, fuel types, and other critical factors, you can select a unit that provides reliable hot water while minimizing costs and environmental

The Top 5 Stubborn Stains and How Professionals Handle Them

0

Stubborn stains are the bane of every homeowner’s existence. No matter how careful you are, accidents happen, and suddenly you’re left with an unsightly blotch that refuses to budge. These stains can range from everyday spills to more challenging spots that embed themselves deep into fabrics or surfaces. The good news is that professional cleaners have the tools and expertise to tackle even the most stubborn stains. In this article, we’ll explore the top 5 most persistent stains and how professionals handle them to restore your surfaces to their original state.

1. Red Wine Stains

Why It’s Stubborn: Red wine is notorious for its staining potential, especially on carpets, upholstery, and fabrics. The dark pigments in red wine can quickly penetrate fibers, leaving a deep, visible stain that’s tough to remove.

How Professionals Handle It: When dealing with red wine stains, time is of the essence. Professionals often begin by blotting up as much of the wine as possible using a clean, white cloth. They avoid rubbing, which can spread the stain further. Next, they use a specialized enzyme cleaner designed to break down the tannins and pigments in the wine. If the stain is particularly stubborn, they might employ a steam cleaner to lift the stain from the fibers. For older stains, a combination of pre-treatment solutions and deep-cleaning techniques ensures the stain is removed without damaging the material.

2. Grease and Oil Stains

Why It’s Stubborn: Grease and oil stains are common in kitchens and garages, where cooking and machinery are prevalent. These stains are challenging because they don’t dissolve in water, making them resistant to regular cleaning methods.

How Professionals Handle It: Professionals start by applying an absorbent powder, such as cornstarch or baking soda, to the grease or oil stain. This helps to draw out some of the oil from the material. After allowing the powder to sit, they vacuum it up and assess the remaining stain. They then apply a specialized solvent that breaks down the oil, making it easier to remove. In some cases, a steam cleaner may be used to apply heat and pressure, which can help lift the remaining stain. For stubborn stains on fabrics, dry cleaning may be recommended.

3. Ink Stains

Why It’s Stubborn: Ink stains are particularly tricky because they can spread easily and embed themselves deeply into fibers. Once ink penetrates a surface, it can become a permanent mark if not treated correctly.

How Professionals Handle It: The key to removing ink stains is acting quickly. Professionals often use rubbing alcohol or a specialized ink remover, carefully applying it to the stain without spreading it further. For larger stains, they may use a blotting technique to lift the ink off the surface. In some cases, they might apply a gentle abrasive to the area to help break down the ink particles. After treating the stain, they rinse the area with cold water and repeat the process if necessary. For more delicate fabrics, they may opt for dry cleaning or use a steam cleaner to ensure the ink is thoroughly removed without damaging the material.

4. Blood Stains

Why It’s Stubborn: Blood stains are among the most challenging to remove, especially if they’ve dried. The proteins in blood can bond tightly with fabrics, making it difficult to lift the stain without damaging the material.

How Professionals Handle It: When dealing with blood stains, professionals typically start with cold water, as hot water can set the stain further. They apply a specialized enzyme cleaner designed to break down the proteins in the blood, allowing them to lift the stain more easily. If the stain is dried, they may pre-treat it with a mixture of cold water and an enzyme-based detergent, gently working the solution into the fabric. For carpets and upholstery, they may use a steam cleaner or a hot water extraction method to remove the stain completely. After treatment, they thoroughly rinse the area to ensure no residue is left behind.

5. Pet Stains

Why It’s Stubborn: Pet stains, especially those caused by urine, are difficult to remove because they not only leave a visible mark but also an odor. The ammonia in urine can seep deep into carpets and upholstery, making it challenging to eradicate without professional help.

How Professionals Handle It: Professionals use a multi-step approach to tackle pet stains. First, they blot up as much of the liquid as possible. They then apply an enzyme-based cleaner that breaks down the proteins and uric acid in the stain, which helps to neutralize the odor. For older or set-in stains, they may use a steam cleaner to apply heat and pressure, which can help lift the stain from deep within the fibers. After cleaning, they may also apply a deodorizer to ensure that any lingering odors are eliminated. For pet stains on hard surfaces, a combination of enzyme cleaners and disinfectants may be used to remove the stain and sanitize the area.

Why Professional Cleaning Matters

While DIY methods can sometimes be effective for minor stains, stubborn stains often require professional intervention to ensure they are removed completely and without damaging the surface. Here’s why professional cleaning is essential:

  1. Expertise: Professional cleaners have extensive training in stain removal, allowing them to identify the type of stain and choose the most effective method for removal.
  2. Specialized Equipment: Professionals have access to high-quality, industrial-grade cleaning equipment that can tackle stains more effectively than standard household products.
  3. Preventing Damage: Using the wrong cleaning method can sometimes make a stain worse or damage the material. Professionals know how to treat different fabrics and surfaces without causing harm.
  4. Time-Saving: Removing stubborn stains can be time-consuming and frustrating. Professionals can handle the task quickly and efficiently, saving you time and stress.
  5. Long-Term Results: Professional cleaning not only removes the stain but also helps to preserve the quality and longevity of your fabrics and surfaces.

DIY vs. Professional Cleaning: When to Call in the Experts

It’s tempting to try and handle stains yourself, especially with the abundance of DIY cleaning tips available online. However, there are certain situations where professional cleaning is the best option:

  • Large Stains: If a stain covers a significant area, it’s best to leave it to the professionals who have the equipment to handle large-scale cleaning.
  • Delicate Fabrics: If the stained material is delicate or valuable, such as silk or antique upholstery, professional cleaning ensures the material is treated with care.
  • Persistent Odors: If a stain is accompanied by a persistent odor, such as with pet urine, professional cleaning is necessary to completely remove the source of the odor.
  • Previous DIY Attempts Failed: If you’ve already tried to remove the stain yourself without success, it’s time to call in the experts to avoid causing further damage.

Conclusion

Stubborn stains are a part of life, but they don’t have to be permanent. With the right approach and expertise, even the most persistent stains can be removed, restoring your home’s surfaces to their original beauty. While DIY methods can be effective for minor stains, professional cleaning is often the best solution for more challenging spots. By understanding how professionals handle different types of stains, you can better appreciate the value of professional cleaning services and make informed decisions about how to care for your home.

How to Secure Your Garage and Other Vulnerable Entry Points

0

Your home is your sanctuary, a place where you should feel safe and secure. However, many homeowners overlook key areas of their homes that are vulnerable to break-ins, particularly the garage and other entry points like windows and back doors. Securing these areas is crucial to protecting your property and loved ones. This guide will walk you through practical steps to secure your garage and other vulnerable entry points, helping you create a robust defense against potential intruders.

Understanding the Importance of Garage Security

Garages are often seen as secondary to the main living areas of a home, but they are a prime target for burglars. A garage door, especially one that is old or manually operated, can be a weak link in your home’s security system. Many garages also have interior access to the house, making them an even more attractive target. Securing your garage should be a top priority in your overall home security strategy.

Assessing Your Garage’s Vulnerabilities

The first step in securing your garage is to assess its current security weaknesses. Consider the following points:

  1. Garage Door Type: Automatic garage doors are generally more secure than manual ones, but even they can be vulnerable if not properly maintained. Check if your garage door has a strong locking mechanism and if it’s possible for intruders to bypass it.
  2. Windows in the Garage: Windows in garages can be an easy entry point. Assess if they are visible from the street and whether they have strong locks or security bars.
  3. Interior Access Door: The door leading from the garage into your home should be as secure as your front door. Ensure it’s made of solid material and equipped with a deadbolt lock.
  4. Lighting Around the Garage: Poor lighting can make it easier for intruders to approach your garage unnoticed. Assess the lighting around your garage and consider installing motion-sensor lights.

Strengthening Your Garage Door

Your garage door is the most obvious entry point and requires particular attention. Here’s how to secure it:

  1. Upgrade to a Stronger Door: If your garage door is old or flimsy, consider upgrading to a more robust, modern model. Steel or solid wood doors offer better security compared to older, lighter materials.
  2. Install a Garage Door Lock: Even if you have an automatic door, a manual lock can add an extra layer of security. Consider installing a sliding bar lock or a garage door deadbolt.
  3. Use a Garage Door Timer: Forgetting to close your garage door can leave your home vulnerable. Install a timer that automatically closes the door after a certain period.
  4. Secure the Emergency Release: Most garage doors have an emergency release that can be accessed from the outside with a simple coat hanger. Secure this release with a zip tie or a manual lock to prevent tampering.
  5. Install a Security System: Adding a security system specifically for your garage can deter burglars. Motion sensors, door sensors, and security cameras can provide real-time alerts if someone tries to break in.

Securing Garage Windows

Windows are another vulnerable spot in your garage. Here are some tips to secure them:

  1. Install Window Bars: Window bars can be an effective deterrent, preventing burglars from breaking in through the windows.
  2. Use Shatterproof Glass: Replace standard glass with shatterproof or reinforced glass to make it more difficult for intruders to break.
  3. Apply Security Film: Security film adds a layer of protection to your windows, making them harder to break. It also holds the glass together if someone tries to smash it.
  4. Install Window Locks: Ensure all windows have strong, tamper-resistant locks. Consider upgrading to key-operated locks for added security.

Strengthening the Interior Access Door

The door that connects your garage to your home is a critical point of security. Here’s how to secure it:

  1. Install a Deadbolt Lock: A deadbolt is one of the most effective ways to secure a door. Ensure the deadbolt is at least one inch long and that the door frame is reinforced to prevent kick-ins.
  2. Use a Door Reinforcement Kit: A reinforcement kit can strengthen the door jamb, making it much harder for intruders to force the door open.
  3. Install a Peephole: A peephole allows you to see who is in the garage without opening the door. This can be especially useful if you hear suspicious noises coming from the garage.
  4. Use a Door Brace: A door brace adds an extra layer of protection by preventing the door from being opened, even if the lock is bypassed.

Enhancing Security for Other Vulnerable Entry Points

While your garage is a major focus, it’s also important to secure other vulnerable entry points around your home, including windows, back doors, and basement entrances.

  1. Secure All Exterior Doors: All exterior doors should be made of solid wood or metal, equipped with deadbolts, and have reinforced frames. Consider adding smart locks that provide keyless entry and can be monitored remotely.
  2. Install Security Cameras: Place security cameras at all major entry points, including back doors, basement entrances, and first-floor windows. Modern security cameras can be monitored via smartphone, providing real-time alerts if any unusual activity is detected.
  3. Reinforce Windows: All ground-level windows should have security bars or reinforced glass. Window locks should be strong, and window sensors should be added as part of your home security system.
  4. Use Motion-Sensor Lighting: Install motion-sensor lights around your home’s perimeter. These lights will turn on when someone approaches, deterring potential intruders.
  5. Secure Sliding Glass Doors: Sliding glass doors are particularly vulnerable. Install a security bar in the track to prevent the door from being forced open, and consider adding a shatterproof film to the glass.

Incorporating Technology into Your Home Security

Technology can play a significant role in securing your garage and other vulnerable entry points. Here’s how to integrate modern solutions:

  1. Smart Garage Door Openers: These devices allow you to control your garage door remotely through your smartphone. You can check whether the door is open or closed and receive alerts if it’s opened unexpectedly.
  2. Smart Locks: Install smart locks on all exterior doors. These locks can be controlled remotely, allowing you to lock or unlock your doors from anywhere and monitor access.
  3. Home Security Systems: Invest in a comprehensive home security system that covers all entry points, including the garage. Look for systems that offer 24/7 monitoring, real-time alerts, and integration with smart home devices.
  4. Video Doorbells: A video doorbell lets you see and speak with anyone at your front door, even if you’re not home. It’s a great way to monitor activity at one of your home’s most important entry points.

Regular Maintenance and Checks

Even the best security measures can fail if they’re not properly maintained. Regularly check the following:

  1. Garage Door Mechanics: Ensure the garage door opens and closes smoothly. Lubricate the tracks and hinges regularly and check for any signs of wear or damage.
  2. Locks and Security Devices: Test all locks, alarms, and security cameras periodically. Replace batteries as needed and update software on smart devices to ensure they’re functioning correctly.
  3. Lighting: Replace any burned-out bulbs in your motion-sensor lights and check that they activate as expected.
  4. Home Security System: Regularly test your home security system to ensure all sensors, alarms, and cameras are working. Contact your security provider if any issues arise.

Creating a Security Routine

Developing a security routine can help ensure that your home remains protected. Consider the following:

  1. Nightly Checks: Before going to bed, do a quick check to ensure all doors and windows are locked, the garage door is closed, and security systems are activated.
  2. Vacation Precautions: If you’re going away, take extra precautions like asking a neighbor to keep an eye on your home, setting up lights on timers, and double-checking that all entry points are secure.
  3. Involving Family Members: Educate your family about the importance of home security. Make sure everyone knows how to lock doors and windows, use the alarm system, and respond to any security alerts.

Conclusion

Securing your garage and other vulnerable entry points is essential to protecting your home from intruders. By assessing vulnerabilities, reinforcing doors and windows, incorporating technology, and maintaining your security measures, you can create a robust defense that keeps your property and loved ones safe. Remember, home security is not just about installing devices; it’s about creating habits and routines that ensure your home remains a safe haven.

Tips for Maintaining Your Home’s Windows and Doors

0

Your home’s windows and doors are essential components of your living space, playing a vital role in your property’s aesthetics, energy efficiency, security, and comfort. However, like any other part of your home, they require regular maintenance to ensure they function properly and last longer. In this article, we’ll explore practical tips for maintaining your home’s windows and doors to keep them in top condition for years to come.

1. Regular Cleaning

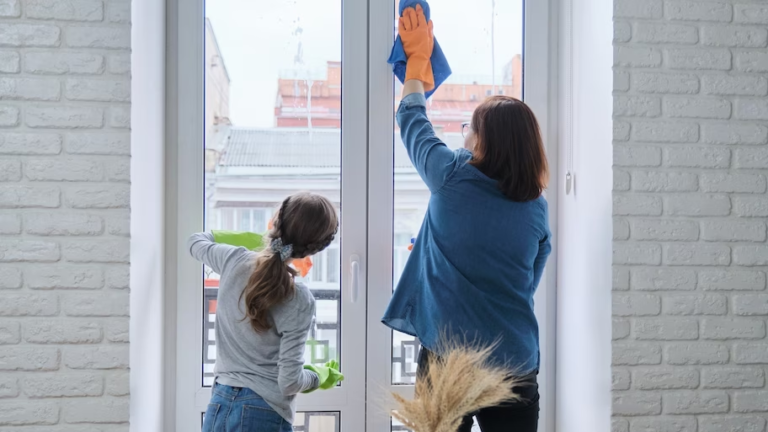
Regular cleaning is the first step in maintaining your windows and doors. Dust, dirt, and grime can accumulate on the surfaces, leading to unsightly stains and potentially damaging the materials over time. For windows, use a mild detergent mixed with water and a soft cloth to clean the glass, frame, and tracks. Avoid using harsh chemicals that can damage the finish or scratch the glass. For doors, especially exterior ones, wipe down the surface with a damp cloth and a gentle cleaner to remove dirt and fingerprints. Regular cleaning not only enhances the appearance of your windows and doors but also helps prevent damage and prolongs their lifespan.

2. Inspect for Damage

Regular inspections are crucial for identifying any signs of damage early. Check your windows and doors for cracks, chips, or gaps in the frames, glass, or seals. Look for signs of wear and tear on hinges, handles, and locks. Pay attention to any drafts coming through closed windows or doors, as this could indicate a problem with the seal or frame. Early detection of issues allows you to address them before they become more significant and costly problems.

3. Lubricate Moving Parts

Windows and doors have moving parts like hinges, locks, and tracks that can wear down or become stiff over time. To keep them functioning smoothly, it’s important to lubricate these parts regularly. Use a silicone-based lubricant for hinges and locks to prevent rust and ensure they move freely. For sliding doors and windows, apply a lubricant to the tracks to make opening and closing easier. Avoid using oil-based lubricants, as they can attract dirt and grime, leading to further issues.

4. Check and Replace Weatherstripping

Weatherstripping around windows and doors is essential for preventing drafts and maintaining energy efficiency. Over time, weatherstripping can wear out, crack, or become loose, compromising its effectiveness. Inspect the weatherstripping regularly and replace it if necessary. New weatherstripping can significantly improve your home’s insulation, reducing energy costs and keeping your home comfortable.

5. Repaint or Refinish as Needed

Wooden windows and doors may require repainting or refinishing to protect them from the elements. Peeling paint or a dull finish can expose the wood to moisture, leading to rot and other damage. To maintain the integrity and appearance of your windows and doors, repaint or refinish them every few years. Before applying a new coat of paint or finish, sand down any rough spots and repair any cracks or holes to ensure a smooth and even application.

6. Seal Gaps and Cracks

Gaps and cracks around windows and doors can lead to drafts, energy loss, and even pest infestations. Inspect the areas around your windows and doors for any gaps or cracks in the frame, sill, or wall. Use caulk to seal any small cracks or gaps you find. For larger gaps, consider using expanding foam insulation to fill the space. Properly sealing these areas can improve your home’s energy efficiency and protect against unwanted pests.

7. Inspect and Repair Screens

Window and door screens provide ventilation while keeping insects out, but they can become damaged over time. Regularly inspect your screens for tears, holes, or loose edges. If you find any damage, repair it promptly or replace the screen if necessary. Maintaining your screens not only keeps pests out but also allows you to enjoy fresh air without compromising your home’s security.

8. Protect Against Moisture

Moisture is one of the biggest threats to windows and doors, especially if they are made of wood. Water can seep into the wood, causing it to swell, warp, or rot. To protect against moisture, ensure that your windows and doors are properly sealed and that the surrounding areas are free of standing water. If you notice any signs of water damage, such as discoloration, swelling, or softness in the wood, address the issue immediately to prevent further damage.

9. Upgrade to Energy-Efficient Windows and Doors

If your windows and doors are old or inefficient, consider upgrading to energy-efficient models. Modern windows and doors are designed to provide better insulation, reduce energy consumption, and enhance comfort. Look for windows and doors with Energy Star ratings, which indicate they meet or exceed energy efficiency standards. While this may be a more significant investment upfront, it can lead to substantial savings on your energy bills and improve the overall comfort of your home.

10. Use Window Treatments for Protection

Window treatments like curtains, blinds, or shades can provide additional protection for your windows. They help block out harmful UV rays, which can fade furniture, flooring, and the window frames themselves. Additionally, window treatments can provide insulation, keeping your home warmer in the winter and cooler in the summer. Choose treatments that complement your home’s decor while offering the protection and energy efficiency you need.

11. Consider Installing Storm Windows or Doors

Storm windows and doors offer an extra layer of protection against harsh weather conditions. They can reduce drafts, improve insulation, and protect your primary windows and doors from damage caused by wind, rain, or hail. Installing storm windows or doors can be a cost-effective way to enhance your home’s energy efficiency and extend the life of your existing windows and doors.

12. Keep Tracks and Frames Clear

The tracks and frames of your windows and doors can accumulate dirt, debris, and even mold over time. This buildup can hinder the operation of your windows and doors, making them difficult to open or close. To prevent this, regularly clean the tracks and frames with a vacuum or a small brush. Ensure that the drainage holes in the frames are clear to prevent water buildup, which can lead to mold growth and damage.

13. Secure Your Windows and Doors

Security is a crucial aspect of window and door maintenance. Ensure that all locks, hinges, and handles are in good working condition. If you have older windows or doors with outdated locking mechanisms, consider upgrading to more secure options. Installing security bars or grilles on vulnerable windows, especially in ground-floor rooms, can provide an added layer of protection. Regularly check that all security features are functioning correctly and repair or replace any that are not.

14. Adjust Window and Door Alignment

Over time, windows and doors can become misaligned due to the natural settling of your home or wear and tear. Misalignment can cause drafts, make it difficult to open or close your windows and doors, and even lead to damage. Check the alignment of your windows and doors periodically, and if you notice any issues, adjust them as needed. For more complex alignment problems, you may need to consult a professional to ensure the proper functioning of your windows and doors.

15. Protect Against Extreme Weather

Extreme weather conditions, such as high winds, heavy rain, or snow, can take a toll on your windows and doors. To protect them, consider installing shutters or storm panels, especially if you live in an area prone to hurricanes or severe storms. Additionally, ensure that your windows and doors are properly sealed and that any gaps or cracks are filled before the storm season begins. Taking these precautions can prevent damage and extend the life of your windows and doors.

16. Maintain Proper Ventilation

Proper ventilation is essential for preventing condensation on your windows and doors, which can lead to mold and mildew growth. Ensure that your home is well-ventilated, especially in areas with high humidity, such as bathrooms and kitchens. Use exhaust fans, dehumidifiers, or air conditioning to control moisture levels and prevent condensation from forming on your windows and doors.

17. Consider Professional Maintenance

While many maintenance tasks can be done by homeowners, some may require the expertise of a professional. If you’re unsure about how to address specific issues with your windows or doors, or if you notice significant damage, it’s best to consult a professional. They can provide a thorough inspection, make necessary repairs, and offer advice on how to maintain your windows and doors properly.

18. Ensure Proper Insulation

Proper insulation around your windows and doors is crucial for maintaining energy efficiency and comfort in your home. Check the insulation around your windows and doors to ensure there are no gaps or areas where air can escape. If you find any issues, consider adding additional insulation or replacing old, worn-out materials. Proper insulation can help reduce your energy bills and keep your home at a comfortable temperature year-round.

19. Address Condensation Issues

Condensation can be a common problem with windows, especially in colder climates. It occurs when warm, moist air comes into contact with a cold surface, such as a windowpane. While some condensation is normal, excessive moisture can lead to mold growth, wood rot, and other damage. To minimize condensation, ensure proper ventilation, use a dehumidifier, and consider installing double or triple-pane windows with insulating gas between the panes. These steps can help reduce condensation and protect your windows from moisture-related damage.

20. Regularly Update Your Maintenance Routine

As your windows and doors age, their maintenance needs may change. Regularly updating your maintenance routine based on the age, materials, and condition of your windows and doors is essential. For example, older wooden windows may require more frequent painting or sealing, while newer vinyl windows may need less upkeep. Stay informed about the specific maintenance requirements of your windows and doors, and adjust your routine as needed to keep them in optimal condition.

Conclusion

Maintaining your home’s windows and doors is crucial for ensuring their longevity, functionality, and appearance. By following these tips, you can keep your windows and doors in top condition, enhance your home’s energy efficiency, and avoid costly repairs. Regular cleaning, inspections, lubrication, and addressing any damage promptly are key to preserving these essential components of your home. Whether you’re performing routine maintenance or considering upgrades, taking care of your windows and doors will pay off in the long run, providing you with a comfortable, secure, and beautiful living space.

The Benefits of Open-Concept Home Renovations

0

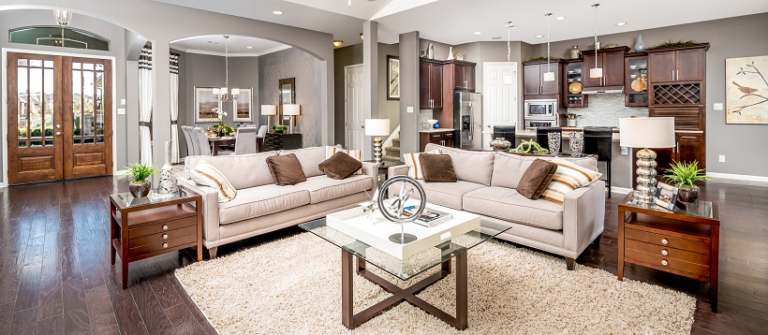
Open-concept home renovations have become a popular choice for homeowners looking to modernize their living spaces. This design philosophy removes walls and barriers, creating a seamless flow between different areas of the home. Whether you’re renovating a small apartment or a large family house, the open-concept layout offers numerous benefits that can enhance your home’s functionality, aesthetics, and value.

1. Maximizing Space Efficiency

One of the most significant advantages of an open-concept home is the efficient use of space. By eliminating walls, you can make even a small area feel much larger. This is particularly beneficial for urban homes where square footage is limited. Without walls to block the flow of light and movement, each room can serve multiple functions, making your home feel more expansive and versatile.

2. Enhanced Natural Light

Natural light is a valuable asset in any home. Open-concept renovations allow light to travel freely throughout the space, reducing the need for artificial lighting and creating a warm, inviting atmosphere. With fewer barriers, sunlight can penetrate deeper into your home, brightening up even the darkest corners. This not only improves the aesthetic appeal but also contributes to energy efficiency, as you’ll rely less on electric lighting during the day.

3. Improved Traffic Flow

In traditional home layouts, walls and doors can create bottlenecks and disrupt the natural flow of movement. Open-concept designs eliminate these obstacles, allowing for a smoother transition from one area to another. This is particularly advantageous in high-traffic areas like the kitchen, dining room, and living room. With an open floor plan, your home feels more connected, making it easier for family members and guests to move around without feeling cramped.

4. Creating a Social Hub

One of the most appealing aspects of open-concept living is its ability to bring people together. By removing walls between the kitchen, dining, and living areas, you create a communal space that encourages interaction and socialization. Whether you’re hosting a dinner party or spending a quiet evening with family, an open layout allows everyone to be part of the action, fostering a sense of togetherness and inclusion.

5. Flexibility in Design

An open-concept home provides greater flexibility in interior design. Without the constraints of walls, you have more freedom to arrange your furniture and decor in a way that suits your lifestyle. This adaptability allows you to easily change the layout of your home as your needs evolve. For instance, you can create distinct zones within the open space for dining, lounging, or working, all while maintaining a cohesive look.

6. Increased Property Value

Investing in an open-concept renovation can significantly boost your home’s market value. Modern buyers are often drawn to open floor plans because they offer a contemporary living experience that traditional layouts cannot match. Homes with open-concept designs tend to sell faster and at higher prices, making this renovation a smart investment if you plan to sell in the future.

7. Easier Communication

In a home with an open layout, communication becomes much easier. Whether you’re in the kitchen preparing a meal or relaxing in the living room, you can easily converse with others without shouting across walls. This is especially beneficial for families with young children, as it allows parents to keep an eye on their kids while going about their daily tasks.

8. Promotes a Modern Aesthetic

The open-concept design is synonymous with modern living. It offers a clean, uncluttered look that appeals to contemporary tastes. By integrating different areas of your home, you can create a seamless, cohesive design that feels both stylish and functional. This modern aesthetic is not only visually appealing but also aligns with the minimalist trend that continues to gain popularity.

9. Better Entertaining Opportunities

If you love hosting gatherings, an open-concept home is ideal. The open layout allows you to entertain guests more effectively, as you can prepare food in the kitchen while still engaging with your guests in the living or dining area. The lack of walls means you’re not isolated from the action, making your home the perfect setting for social events.

10. Optimizing for Future Technology

As smart home technology becomes more prevalent, open-concept designs are better suited to accommodate these advancements. With fewer physical barriers, it’s easier to integrate smart devices and systems that require connectivity throughout the home. Whether it’s smart lighting, home security, or entertainment systems, an open layout provides a more conducive environment for a tech-savvy lifestyle.

11. Improved Air Circulation

Another practical benefit of open-concept renovations is improved air circulation. Without walls to block airflow, your home can stay cooler in the summer and warmer in the winter. This natural ventilation can help reduce your reliance on heating and cooling systems, leading to energy savings and a more comfortable living environment.

12. Encourages Clean, Organized Living

With an open-concept home, clutter becomes more noticeable, which encourages you to maintain a clean and organized space. The lack of hidden corners and closed-off rooms means you’re more likely to keep your living areas tidy. This can lead to a more organized lifestyle, where everything has its place, and your home feels more serene and inviting.

13. Seamless Integration of Indoor and Outdoor Spaces

An open-concept design can also extend to the outdoors, creating a seamless transition between indoor and outdoor living areas. By using large glass doors or windows that open onto a patio or deck, you can blur the lines between the interior and exterior of your home. This integration enhances your living experience, allowing you to enjoy nature while still being connected to the comforts of home.

14. Ideal for Aging in Place

For those planning to age in place, an open-concept home offers practical benefits. The lack of stairs, narrow hallways, and tight corners makes it easier to move around, especially for individuals with mobility challenges. An open layout can also accommodate future modifications, such as wheelchair ramps or accessible bathrooms, ensuring your home remains functional as your needs change.

15. Increased Safety for Families

Families with young children or elderly members can benefit from the safety features of an open-concept home. With fewer walls and obstacles, there are fewer opportunities for trips and falls. Parents can also keep a closer watch on their children, ensuring they stay safe while playing or exploring the home. This increased visibility and ease of movement contribute to a safer living environment for everyone.

16. Showcasing Architectural Features

An open-concept design allows you to showcase the architectural features of your home. Whether it’s exposed beams, a beautiful staircase, or a statement fireplace, these elements can take center stage without being hidden behind walls. This not only enhances the visual appeal of your home but also adds character and personality to your living space.

17. Creating a Sense of Openness and Freedom

Perhaps the most compelling reason to choose an open-concept renovation is the sense of openness and freedom it creates. The removal of walls and barriers opens up your home, making it feel more expansive and less confining. This sense of space can have a positive impact on your mental well-being, as you feel less restricted and more connected to your surroundings.

18. Easier Maintenance and Cleaning

With fewer rooms and walls, maintaining and cleaning an open-concept home is often easier. There are fewer nooks and crannies where dust and dirt can accumulate, and the open space allows for quicker and more efficient cleaning. This can save you time and effort, allowing you to enjoy your home more and spend less time on upkeep.

19. Supporting Sustainable Living

Open-concept homes are well-suited to sustainable living practices. The increased natural light, improved air circulation, and energy efficiency all contribute to a more eco-friendly lifestyle. Additionally, the minimalist design often associated with open-concept homes encourages the use of fewer materials and less waste, further supporting sustainability.

20. Tailoring to Your Personal Needs

Finally, an open-concept renovation allows you to tailor your home to your personal needs and preferences. Whether you want a space that’s perfect for entertaining, a family-friendly environment, or a modern, minimalist retreat, an open layout gives you the flexibility to create a home that truly reflects your lifestyle.

Conclusion

Open-concept home renovations offer a wide range of benefits, from maximizing space and natural light to improving functionality and aesthetics. Whether you’re looking to create a social hub for entertaining, enhance your home’s value, or simply enjoy a more modern and open living space, an open-concept design can transform your home in ways that traditional layouts cannot. By embracing this design philosophy, you can create a living environment that is not only beautiful and functional but also aligned with the demands of contemporary living.

How to Refresh Your Home’s Interior Design Without Breaking the Bank

0

Revamping your home’s interior doesn’t have to be an expensive endeavor. With some creativity and strategic planning, you can give your space a fresh look that won’t strain your budget. Whether you’re looking to update a single room or your entire home, here’s a comprehensive guide on how to refresh your home’s interior design without breaking the bank.

1. Start with a Vision

Before diving into any design changes, it’s essential to have a clear vision of what you want to achieve. Browse through magazines, websites, or social media platforms like Pinterest to gather inspiration. Identify the styles, colors, and themes that resonate with you. Creating a mood board can help consolidate your ideas and give you a concrete plan to follow.

2. Declutter and Clean

One of the most cost-effective ways to refresh your home is to start with a clean slate. Decluttering your space can instantly make it look more organized and inviting. Sort through your belongings, donate or sell items you no longer need, and give each room a thorough cleaning. A clean and tidy space will enhance any new design elements you introduce.

3. Rearrange Your Furniture

Sometimes, a new arrangement of existing furniture can make a big difference. Experiment with different layouts to find a configuration that maximizes space and improves the flow of the room. Moving furniture around can also help you rediscover pieces you already own, giving them a new purpose in a different setting.

4. Add a Fresh Coat of Paint

Painting is one of the most impactful ways to update your home’s interior without spending a fortune. Choose a new color that complements your existing décor or opt for a trendy hue that reflects your personality. Even painting just one accent wall or updating trim and moldings can make a significant difference.

5. Update Your Accessories

Swap out old accessories for new ones to refresh your space. Consider updating items such as throw pillows, rugs, curtains, and lampshades. These small changes can add a new layer of texture and color to your room without requiring a major overhaul.

6. Incorporate DIY Projects

Get creative with DIY projects to add a personal touch to your home. There are countless DIY ideas that can enhance your interior design, from painting old furniture to creating custom wall art. Pinterest and YouTube offer endless tutorials for budget-friendly DIY projects that can give your home a unique look.

7. Use What You Have

Before buying new items, take stock of what you already own. You might find that rearranging or repurposing existing décor items can breathe new life into your space. For instance, moving a piece of art from one room to another or changing the look of a lamp with a new shade can make a noticeable difference.

8. Shop Second-Hand

Explore thrift stores, garage sales, and online marketplaces for second-hand furniture and décor. You can find unique and affordable pieces that add character to your home. Don’t be afraid to negotiate prices or do minor repairs to items you purchase to make them fit your style.

9. Add Greenery

Plants are an inexpensive way to bring life and color into your home. Choose low-maintenance varieties like succulents, ferns, or pothos that thrive indoors. Adding greenery can improve air quality and create a fresh, vibrant atmosphere in your living space.

10. Focus on Lighting

Updating your lighting can significantly alter the ambiance of your home. Consider swapping out outdated fixtures for modern alternatives or adding additional light sources like floor lamps or table lamps. Using different types of lighting, such as ambient, task, and accent lighting, can also enhance the overall feel of your rooms.

11. Incorporate Textures

Layering different textures can create depth and interest in your home’s design. Mix materials like wood, metal, fabric, and glass to add dimension to your space. For example, combine a plush throw blanket with a sleek metal lamp or pair a woven rug with a soft velvet sofa.

12. Create a Gallery Wall

A gallery wall is a cost-effective way to display art and personal photos. Choose a selection of frames in various sizes and styles, and arrange them in a visually pleasing layout. You can use free printables, family photos, or artwork from local artists to fill the frames.

13. Refresh Your Bedding

Updating your bedding can instantly change the look of your bedroom. Opt for new duvet covers, pillowcases, and bedspreads that complement your room’s color scheme. Adding a few decorative throw pillows or a cozy blanket can also enhance the overall aesthetic.

14. Upgrade Cabinet Hardware

Changing the hardware on your cabinets and drawers is a simple and affordable update. Choose new knobs and handles that match your home’s style, whether it’s modern, traditional, or rustic. This small change can make a big impact on the overall look of your kitchen or bathroom.

15. Repurpose Furniture

Give old furniture a new lease on life by repurposing it. For example, an old dresser can be transformed into a stylish TV stand, or a worn-out chair can be reupholstered with fresh fabric. Repurposing furniture allows you to create custom pieces that fit your design needs.

16. Use Removable Wallpaper

Removable wallpaper is a fantastic option for adding pattern and color without committing to a permanent change. It’s ideal for accent walls, backsplashes, or even furniture. Choose a design that complements your existing décor and easily update it when you’re ready for a change.

17. Add Mirrors

Mirrors can make a room feel larger and brighter by reflecting light and creating the illusion of more space. Place mirrors strategically to enhance natural light and highlight key areas of your room. Choose decorative mirrors that match your style for an added design element.

18. Incorporate New Fabrics

Updating your fabrics can make a significant difference in your home’s appearance. Consider changing out curtains, tablecloths, or upholstery to refresh your space. Look for fabrics in trendy patterns and colors that align with your design vision.

19. Enhance Curb Appeal

Don’t forget the exterior of your home. Improving your curb appeal can create a welcoming first impression. Simple updates like painting the front door, adding potted plants, or updating outdoor lighting can enhance your home’s exterior without a large investment.

20. Utilize Storage Solutions

Effective storage solutions can help keep your home organized and visually appealing. Invest in stylish storage options like baskets, shelves, and bins that complement your décor. Organized spaces feel more serene and can make your home look more polished.

21. Personalize Your Space

Adding personal touches to your home can make it feel unique and inviting. Display cherished items like family photos, travel souvenirs, or handmade crafts. Personalizing your space reflects your personality and makes your home feel truly yours.

22. Experiment with Color

Don’t be afraid to experiment with color in your home. Even small accents like colorful throw pillows, rugs, or vases can add a pop of color and refresh your space. Choose colors that complement your existing décor and create a harmonious look.

23. Refresh Your Entryway

The entryway is the first impression of your home. Update it with new decor, such as a stylish doormat, a coat rack, or a decorative mirror. A well-organized and inviting entryway sets the tone for the rest of your home.

24. Invest in Quality Basics

While it’s important to save money, investing in quality basics can be worthwhile. Focus on durable, timeless pieces that can be easily updated with accessories. Quality basics, like a well-made sofa or a sturdy dining table, provide a solid foundation for your interior design.

25. Stay On Budget

To ensure you don’t overspend, set a budget before starting your home refresh project. Prioritize your needs and allocate funds accordingly. Keep track of your expenses and look for deals and discounts to make the most of your budget.

Refreshing your home’s interior design doesn’t require a massive investment. By following these budget-friendly tips and utilizing your creativity, you can create a beautiful and updated space that reflects your style and personality. Enjoy the process and celebrate the transformation of your home!

Spin Smart: Hidden Patterns in BIG8’s Dynamic Slot Adventures

0

Hey there, fellow adventurers! If you’re diving into the world of online slots, you’ve probably heard of BIG8, the go-to spot for all things fun and thrilling in Bangladesh. With a killer selection of table games, live casino experiences, and, of course, those dynamic slot games, BIG8 is where the action is at. But let’s talk about something that can take your slot game to the next level: hidden patterns. Yep, you heard that right! Let’s spin smart and uncover some secrets that could make your gaming experience even more exciting.

The Allure of Slots

First off, let’s chat about why slots are so popular. They’re easy to play, visually stunning, and let’s be real, who doesn’t love the thrill of hitting that jackpot? BIG8’s slot games are designed to keep you on the edge of your seat with vibrant graphics and engaging sound effects. But here’s the kicker: while it might seem like slots are all about luck, there are actually some patterns and strategies you can tap into to enhance your gameplay.

Understanding the Mechanics

Before we dive into patterns, it’s essential to understand how slots work. Each spin is powered by a Random Number Generator (RNG), which means every outcome is completely random. However, that doesn’t mean you can’t look for trends or patterns in your gameplay. For instance, some players swear by tracking their spins to see if certain machines tend to pay out more frequently. While it’s not a foolproof method, it can help you make more informed choices about where to place your bets.

Finding Hidden Patterns

Now, let’s get to the juicy part—finding those hidden patterns! One approach is to pay attention to the volatility of the slot games you’re playing. High volatility slots might not pay out as often, but when they do, the rewards can be massive. On the flip side, low volatility slots tend to pay out smaller amounts more frequently. By mixing up your gameplay between these types, you can balance your risk and reward.

Another pattern to consider is the time of day you’re playing. Some players believe that certain times yield better results. While there’s no scientific proof behind this, it’s worth experimenting with your schedule to see if you notice any differences in your luck. Plus, playing during off-peak hours might give you a more relaxed experience, allowing you to focus on your strategy.

The BIG8 Advantage

What sets Big8 apart from other platforms is its user-friendly mobile app. Whether you’re on Android or iOS, you can take your slot adventures on the go! This means you can spin those reels anytime, anywhere. Plus, the app is designed to provide a seamless experience, so you won’t miss a beat while you’re hunting for those hidden patterns.

Tips for Smart Spinning

  1. Set a Budget: Before you start spinning, decide how much you’re willing to spend. This helps you avoid overspending and keeps your gaming experience fun.
  2. Try Different Games: Don’t stick to just one slot game. Explore the variety that BIG8 offers. You might find a hidden gem that suits your style!
  3. Take Breaks: It’s easy to get caught up in the excitement, but taking breaks can help you stay sharp and focused.
  4. Join the Community: BIG8 has a vibrant community of players. Engage with others to share tips and strategies. You never know what insights you might gain!

Spin Smart, Win Big!

The key to enjoying your slot adventures at BIG8 is to spin smart. By understanding the mechanics, looking for hidden patterns, and utilizing the fantastic features of the BIG8 platform, you can enhance your gaming experience. Remember, it’s all about having fun and enjoying the thrill of the game. So, get out there, explore those dynamic slots, and may the odds be ever in your favor!